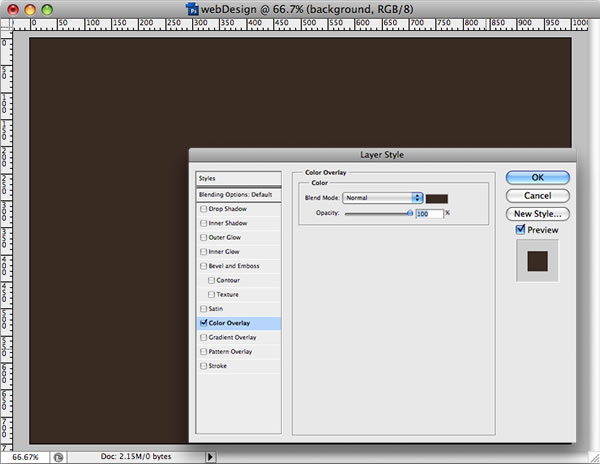
Step 1
Create a new document with 1000x750px. Double click on the background’s layer and in Color Overlay and choose a dark brown.
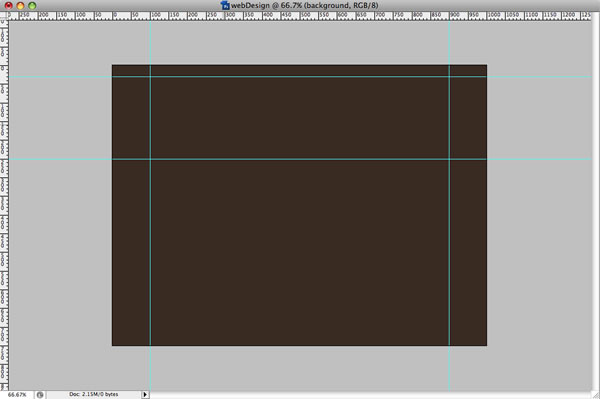
Step 2
Enable the rulers (View>Rulers) on your document and add some guides as shown below. Create 2 horizontal guides, the first at 30px and the second at 250px. After that add 2 vertical guides at 100px and 900px.
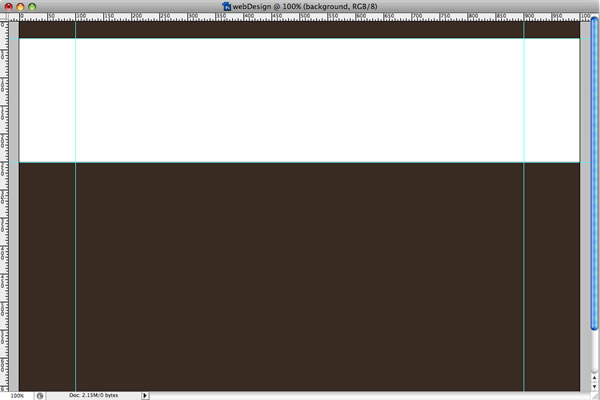
Step 3
Create a rectangle with the Rectangle Tool (U). Use the guides for reference. Rename the layer to “header�.
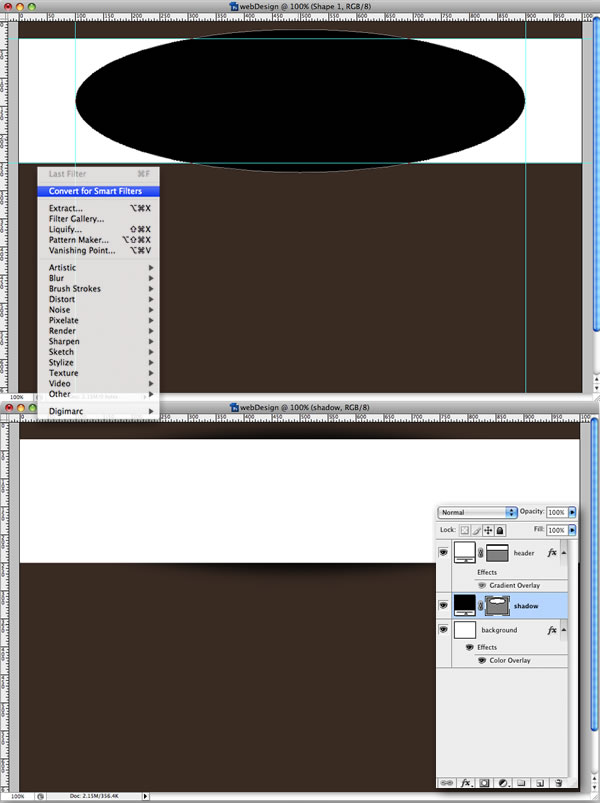
Step 4
Choose black for your foreground color. Select the Ellipse Tool and create the shape that will be the shadow. Make it a bit higher than the white rectangle as shown. Rename the layer to “shadow� and put it below the “header� layer.
After that, convert it to Smart Filters, apply a Gaussian Blur and change the opacity to 60%.
Step 5
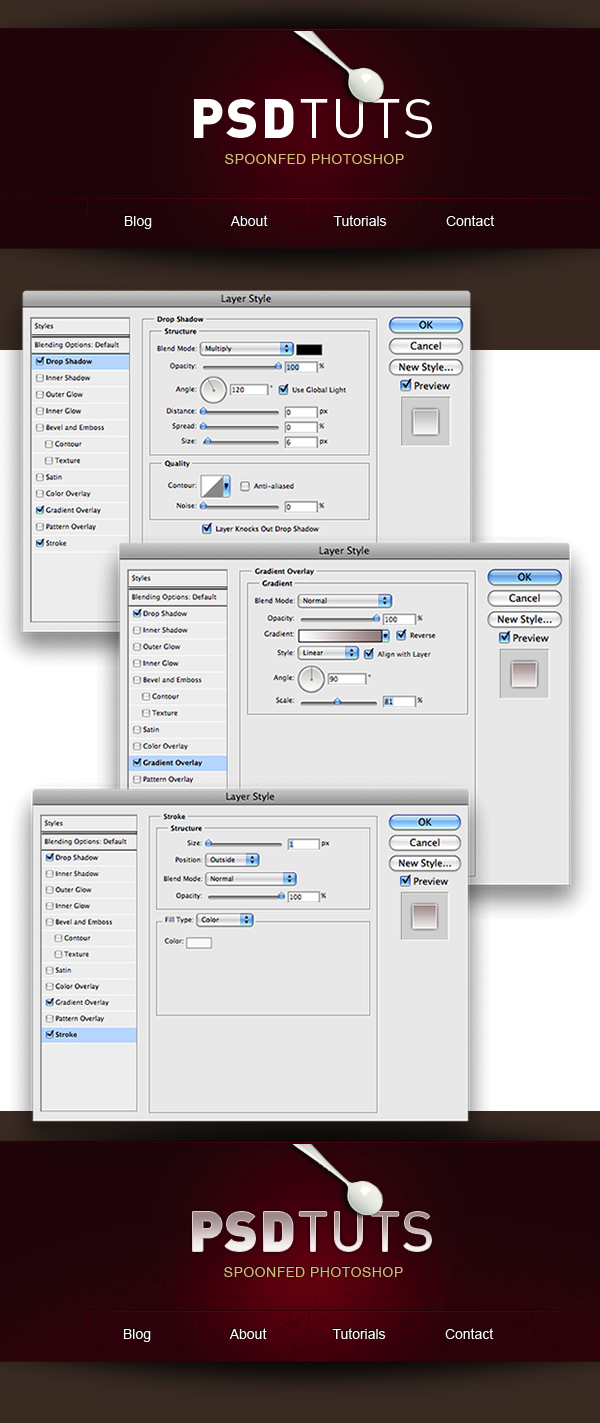
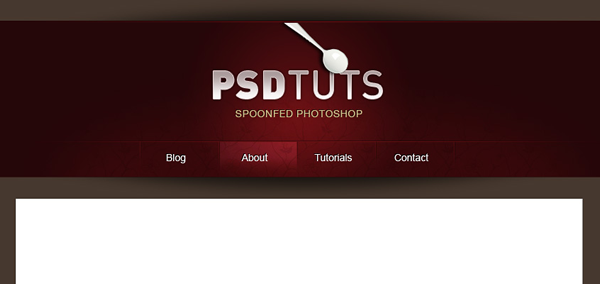
With the “header� layer selected, double click it to open the Layer Style dialog box. Select Gradient Overlay. Change the gradient style to radial. For the colors I used dark reds.

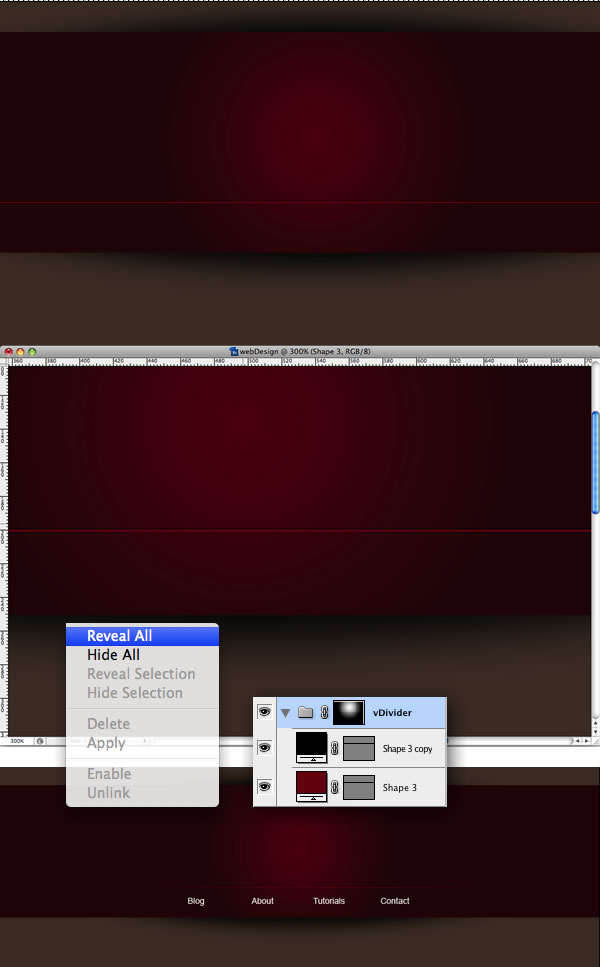
Step 6
Next, select the Line Tool (U) and choose the lighter color of the header gradient and create a line. After that choose black and create another line just 1 pixel above the red line. Select the 2 lines and group them. Rename the group the "vDivider".
Go to Layer>Layer Mask>Reveal All. Using the Gradient Tool, select a Radial Gradient from Black to White and apply a mask to our group. Start the gradient from the center of the group.
Step 7
Create the menu using the Horizontal Type Tool (T). Use white for the text color. Select all links and group them. Rename the group “White Links�.
Duplicate the group and place it below the white links, change the text color to black and move the group 1 pixel up and left. That will create a nice 3D effect, exactly like the one we did with the lines.
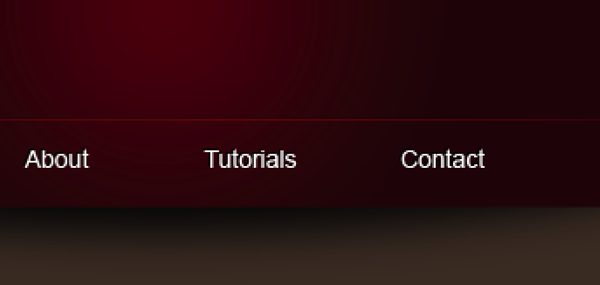
Step 8
Repeat the Step 6, but this time create the horizontal dividers for the links. Use the line tool to draw a red line and 1 pixels to the left draw a black line. Group them and duplicate the group 5 times. Distribute the groups as shown below.

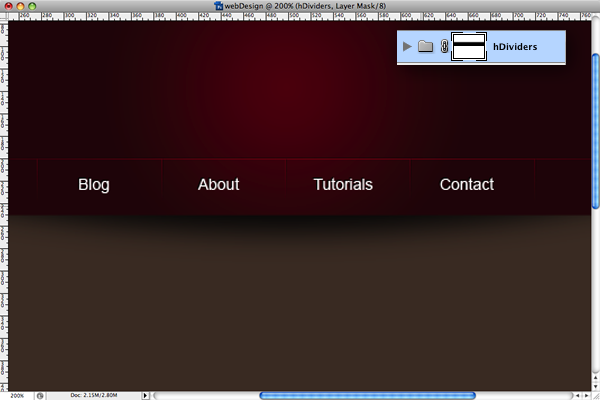
Step 9
Select all groups of lines and group them. Rename the group to “hDividers�. After that apply a layer mask, Layer>Layer Mask>Reveal All. But this time use Linear.
Step 10
Open the pattern file, or get any pattern you like. Select all and go to Edit>Define Pattern. Call it "webPattern".
Duplicate the “header layer� and rename it to “pattern�. Go to its Layer Styles and disable the Gradient Overlay and set a Pattern Overlay. Choose the "webPattern" we created and change the Blend Mode to Color Overlay.
After that apply a layer mask to the pattern layer using a Radial Gradient.
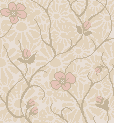
Pattern

Step 11
Now we can add the logo and the spoon.
For the text, type PSDTUTS, select a bold typeface for the PSD and a regular or light for the TUTS. Go to Layer Styles and apply a Drop Shadow, Gradient Overlay, and Stroke. That’s a very common and beautiful effect.
Conclusion
When we work with web design we have to consider file sizes, browser compatibilities and many other issues. Sometimes little details like subtle gradients or borders using 2 colors can create a very nice visual effect or unique style without requiring many hacks and adjustments.
Pessoas visualizando este conteúdo
Total de visualizações
Obrigado pela atenção ate a próxima
0 comentários:
Postar um comentário